Polymer clay is such fun medium to play and create crafts with. It is readily available in craft stores and you can use it to make many fun things like garlands, necklaces, tags, etc. This easy moon garland is just the right project to do with kids.
Materials:
- One package of polymer clay (assorted colors)
- Small moon cookie cutter (Found at Hobby Lobby in the clay section)
- String
- Something to roll your clay with (I used an empty round lotion bottle)
- Craft Baking Sheet
- Hot glue gun
Step 1: Depending on the size of your cutter, break off a small chuck of clay in the desired color. Start by rolling it around your hand to soften it up. Roll into a ball between your hands and then use your roller to flatten it out (like you would cookie dough).
Step 2: Use the moon cutter to cut out all of your moon shapes. Mash up the leftover clay and roll it out again and cut more shapes out of it until you have no more clay left (again just like you would cookie dough).
Step 3: Repeat the steps for all the different color clay you have.
Step 3: Place all your moon shapes on a designated craft baking sheet and bake at 275 for 15-20 minutes (see package information for baking instructions).
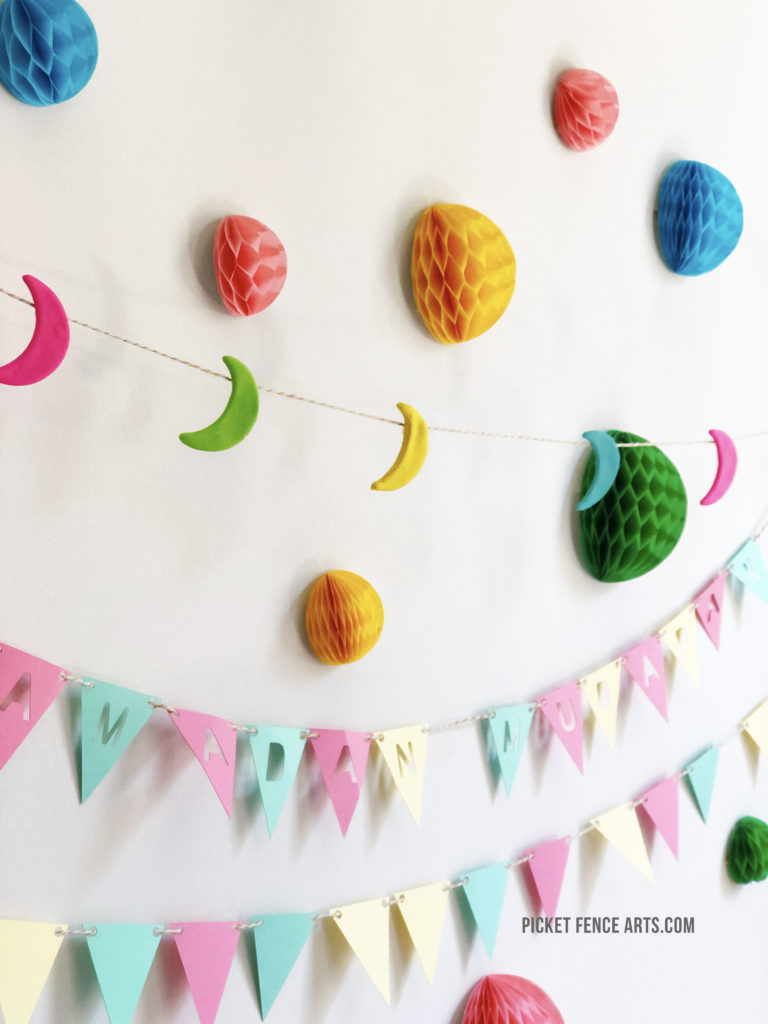
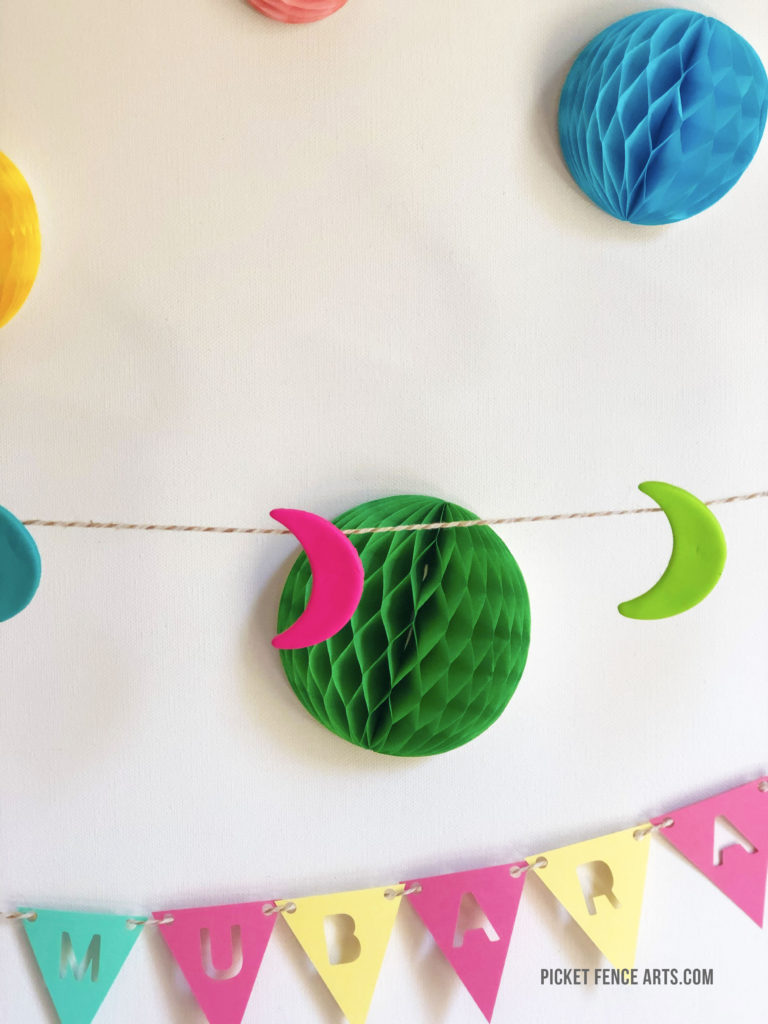
Step 4: Let your moon shapes cool and then use a hot glue gun to carefully place a dab of glue on the back of your moon shape. Place the string on the glue and gently press with a toothpick (I just use a bit of parchment paper). The string will be hot glued to the moon. Evenly space your moons along the string.
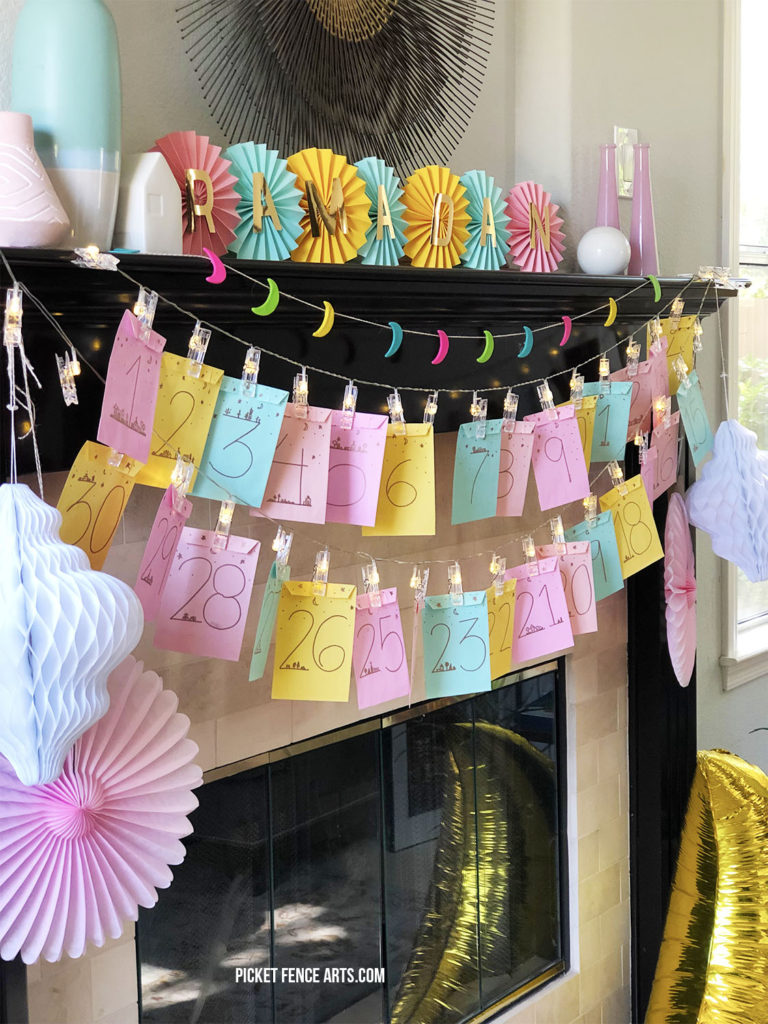
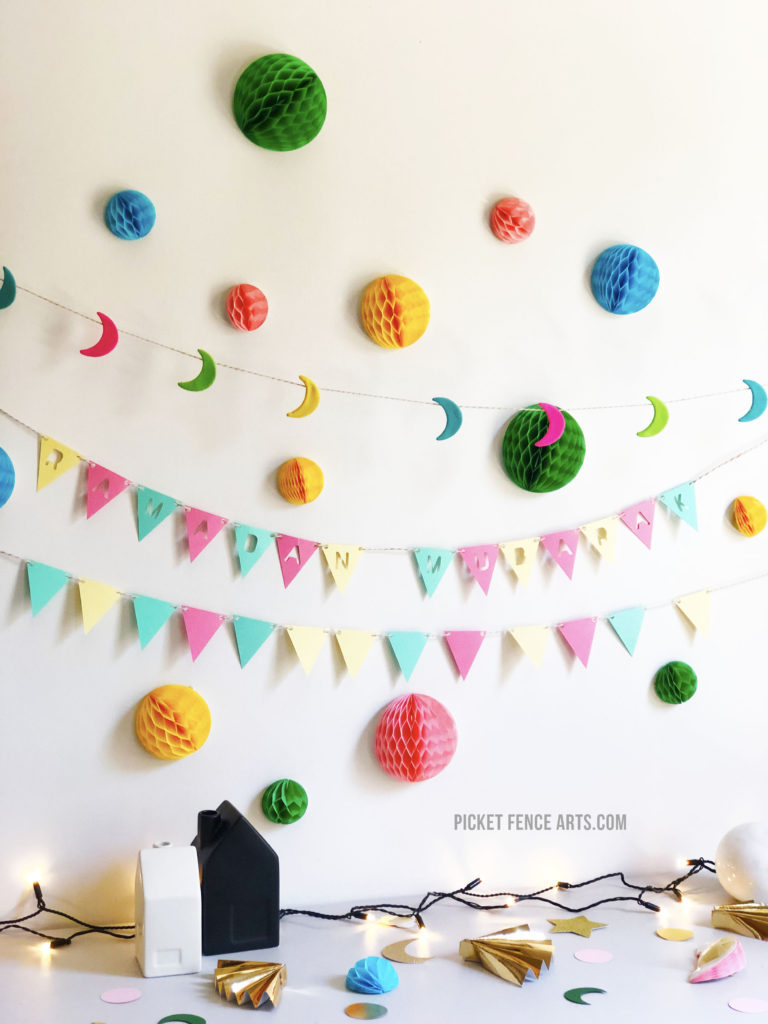
Your moon garland is ready to hang!